Dynamic processing of document content in eSignatureSuite
eSignatureSuite offers to use the option to dynamically process the document content, for example, names, customer IDs, mail adresses or other information at various points of its functionality. All this can help you when it comes to feedback to the signer, the dynamic naming of signed files when saving them or sending them per mail, just to name a few.
This content processing feature always works in the same way, no matter, what you are using it for or where you are calling it from and you can use it everywhere, you find magnifying glass icon  .
.
The most often used way to utilize this feature is possibly renaming document dynamically when saving them and that's why this example is primarily used for this guide.
Dynamic renaming when saving the document
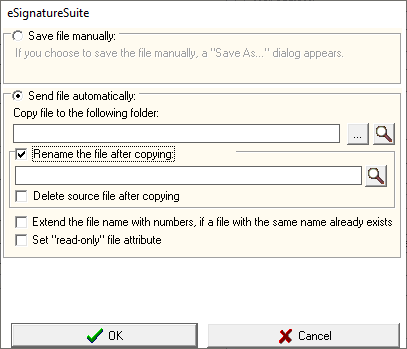
Just like explained above, you can generate the file name by reading and using content of the loaded PDF file. This can be a name or customer ID written down within the PDF document itself. To create a folder name dynamically, you have to create a macro (Automating complex processes: Working with macros), select the saving option "Save file as..." and in the following dialog choose to "Send file automatically". To additionally create the file name dynamically, too, activate the checkbox "Rename the file after copying:"
|
Afterwards, you can open the dialog for the dynamic data processing by clicking the magnifying glass icon:
You can assemble the desired information out of multiple blocks of text by creating search "rules" for each of them. To start this, click the "Add" button and the text fields on the right side will be at your disposal:
- The "Prefix" field can be used to add characters, which will always be written before the actually found search text. In case of dynamically creating a saving location, this could be a static part of the path, like "C:\StepOver\" for example, and the search is looking for the customer's name. So, in the end, the saving path could be "C:\StepOver\John Doe\"
- The next field requires you to provide the search text itself, which is always written inside the document before the desired result (for example "Customer ID:", which then would have to be followed by the ID you are looking for)
- The next step needs you to set the number of characters before or after the chosen search string, which then shall be used as result for your file name (for example, use 8 here, if the customer ID will always have exactly 8 digits/letters)
- However, instead of providing a static exact number, you can use the checkbox "Extract first word only" a little further down to restrict the search to ever include only the first found word before or after your search string. The "first word" is here defined as text until an empty space between two characters is found. This option is most useful, when you don't know how many letters/digits the search result will have, for example when it comes to names.
- Instead of restricting the results to a static number of characters or to only the first word, you can also add a dynamic end point for your search with the "Stoptext" option. This means, that all characters between your "search text" and your "stop text" will be considered to be the search result.
- The checkbox "Exchange Text" will make the string in the field under it to be used as static search result as soon as the given search text has been found. Use this feature to create a "IF X has been found, THEN use Y als result" routine.
- If it could be possible to not find the search text in the document at all, you can provide default text as fallback result. (For example "New Customer", when no customer ID can be found.)
- The checkbox "PDF form field" means, that your search text will not be found in the document directly, but that it's the name of a PDF form field within the document. This leads to the content of the form field to be regarded as the search result, which will be used to dynamically process your data.
- The last option in this dialog is to deactivate the caching of possible search results. This option is only relevant for documents with form fields and it means, that by default eSignatureSuite is preliminarily scanning the opened document for form fields, for example when a signature-set is being loaded. This is done to have faster access to such information later, for example when saving. However, when your search is executed before the document has been filled completely (maybe because it's part of a macro), then the content of an originally empty form field could be regarded as valid search result! By deactivating the caching of search results, you prevent this behaviour and make eSignatureSuite search for the information only when it's needed instead of doing the preliminary scan.
- The option ZUGFeRD Field is a more complicated topic and so it will be explained further down in the chapter ZUGFeRD Support
- In the large text field "Tail of the string", you can write down the file extension and/or other characters, which are supposed to be written at the end of the whole string. If you created multiple searches, those will be added to this field and so in the end - depending on your other settings - the tail of the string will become the complete string.
Beware! When dynamically renaming or saving a file, you don't have to add the file extension ".pdf", because eSignatureSuite will add ".pdf" automatically, if those are not the last 4 characters of your string. |
Beware! If you delete the last search block, but you keep the dynamic renaming option active (for example in a macro), this could mean, that the program would try to save a file without any name at all, when the macro is triggered. To prevent this problem, the prefix of the last active search block will be transfered to the tail of the string field in order to guarantee having any file name at all. If you still wish to have a complete empty string, you have to delete it manually! |
Example guide to dynamic file naming
The following lines shall show you an applied example of the dynamic naming/data processing feature. For this example, the file name is supposed to always consist of two numbers, which can always be found in the used document. This will be a customer ID and also a contract ID. In the end the result is supposed to look like this: | ||||||||||
Contract_CustomerID-ContractID .pdf
| ||||||||||
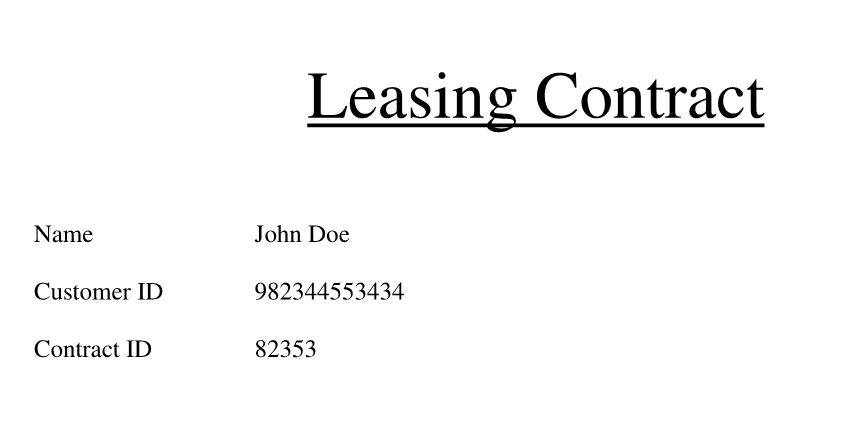
Imagine this to be the part of a document:
| ||||||||||
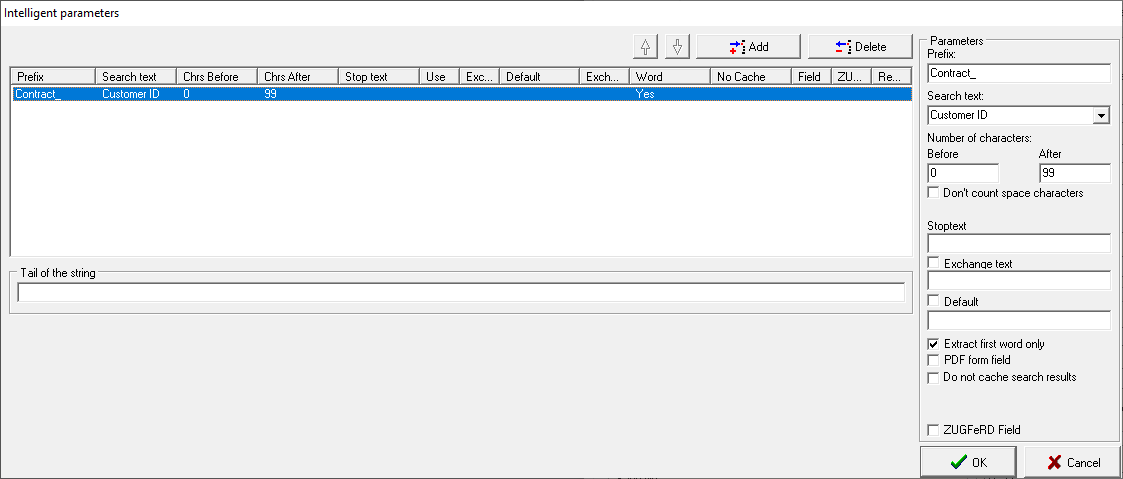
As you first step, add the static prefix "Contract_" and the search text "Customer ID" to a new search block. Because this customer ID does not have a fixed length, set the number of characters to a high value, like 99 for example and activate the check box "Extract first word only" to guarantee, that only the first string of characters will be used as search result instead of the whole 99 characters. Because in the document the next "word" after "Customer ID" (so, the next string of characters without empty space) will be the ID number, it will be added as part of the file name directly after the prefix "Contract_".
| ||||||||||
In the second step, add a new search block and write just a dash "-" as prefix. Because you're adding this search block in the second position, this dash will be written in the file name after the customer ID but before the contract ID, which will follow in the next step. For this, enter "Contract ID" as search text. Because in our example, the contract ID will also have length of exactly 5 digits, you can set the number of characters of characters in the "After" field to "5".
| ||||||||||
Now you are basically done and you can confirm your dynamic processing rules and settings by clicking the "OK" button. The final file name in our example will be: "Contract_982344553434-82353.pdf" and it has been assembled with the following details:
|

ZUGFeRD Support
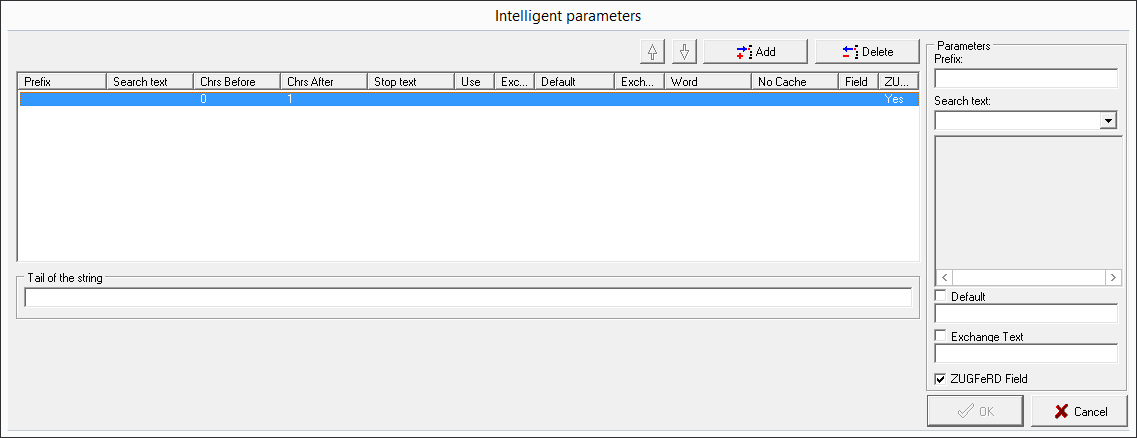
Since version 5.4 eSignatureSuite also supports the ZUGFeRD document type with the German electronic invoice standard format. This means, you can access all the invoice data of the XML embedded in the PDF, which is matching this standard. For the configuration, it's recommended to load a fitting example document, because only then, the XML tags from the loaded document can be shown in the preview list. To read any of these values, add a new search string by clicking the "Add" button and then activate the "ZUGFeRD" checkbox in the lower right of the menu to see the following picture:
Now, write the XML tag, which you want to use, in the search text field. If you already loaded a ZUGFeRD document, the drop down list will show you all available tags/XML nodes, while the field below this will also show you the search result of the selected choice.

In the list, you will find three different kinds of choices:
| Child nodes | Selecting a child node will only read its value. |
| Parent nodes | Selecting a child node will read the values of all its child nodes together. |
| Tag names | Selecting just a tag name will read the value of all nodes, which share this tag name. |
To enable ZUGFeRD information being read from a document, make sure, that the search engine "BLS" is set in the File handling tab in the administration menu! |
Here an example and then explanations of the three different kinds of choices:
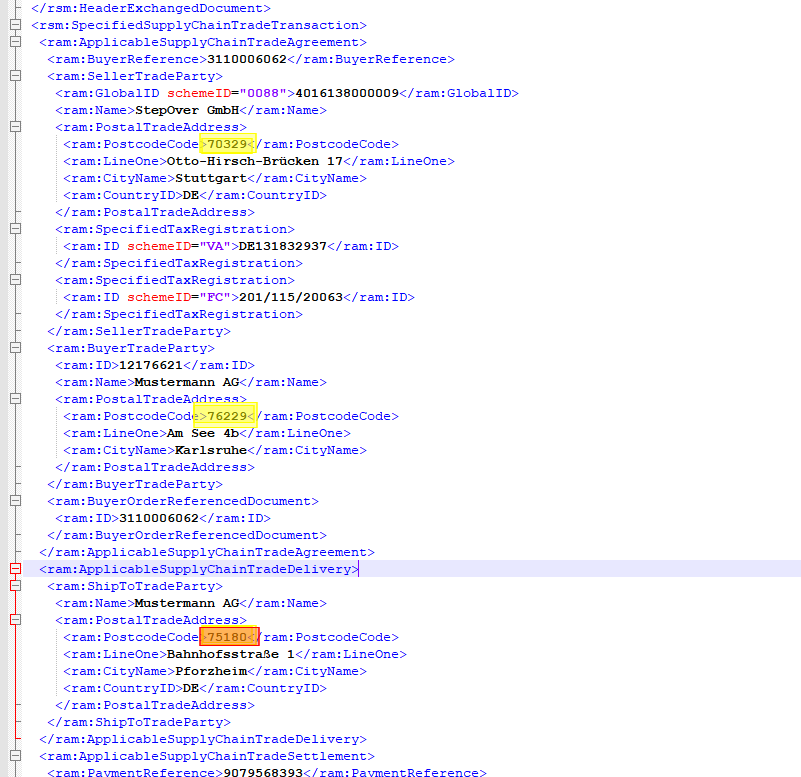
To read the postal code of the delivery address, you need to declare the corresponding child node including all of its parent nodes:
SpecifiedSupplyChainTradeTransaction/ApplicableSupplyChainTradeDelivery/ShipToTradeParty/PostalTradeAddress/PostcodeCode

Wert:   75180
If you want the complete delivery address, you either can compile it out of the different child nodes, or you can directly read the parent node:
SpecifiedSupplyChainTradeTransaction/ApplicableSupplyChainTradeDelivery/ShipToTradeParty/PostalTradeAddress

Wert:   75180
		Bahnhofsstraße 1
		Pforzheim
		DE
By selecting only the tag name "PostcodeCode", all values of all nodes with this name will be read. The results will be in the same order, in which they are found within the XML.
PostcodeCode

Wert:   70329
		76229
		75180
